Stop Server Crashes: Limit CPU and Memory with cgroups v2
Prevent system crashes on Linux! Learn how to limit cpu and memory with cgroups v2 using systemd and Python in this practical guide.

When a Python 3.14.7 application hits an infinite loop or a batch processing script tries to load a dataset larger than available physical RAM, the consequences for the server can be catastrophic. Without proper isolation, a single runaway process consumes all system CPU, exhausts swap memory, and freezes the entire environment, forcing drastic manual intervention. The ultimate solution for maintaining operational stability and predictability on modern distributions is to limit cpu and memory with cgroups v2, the Linux kernel's unified resource control mechanism.
Historically, Linux resource management suffered from complexity and a lack of coordination across control subsystems. cgroups v2 addresses this bottleneck by reorganizing the entire process tree under a single unified hierarchy. Whether you are isolating microservices on Ubuntu 26.04.1, restricting ephemeral containers, or protecting databases like PostgreSQL 18.6 from resource hogging, mastering cgroups v2 alongside systemd is an essential skill for any modern developer or systems administrator.
Why did cgroups v2 unified model replace v1?
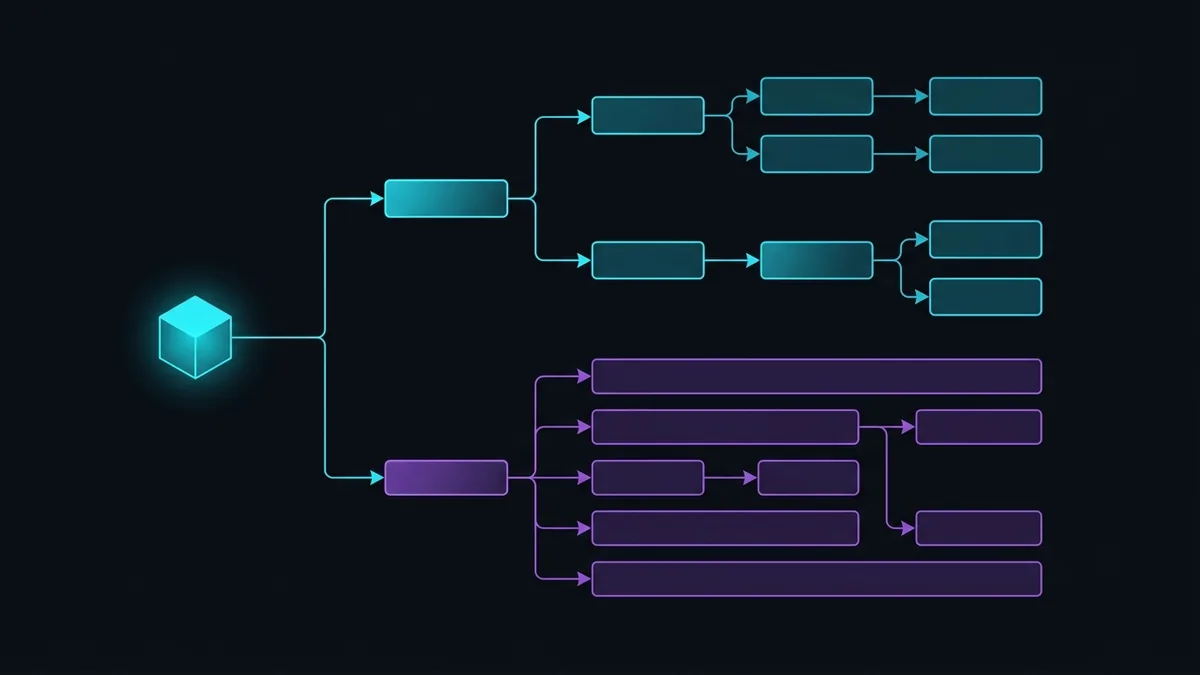
The transition from version 1 to version 2 of cgroups was far more than an incremental update; it was a fundamental architectural redesign in the Linux kernel. In cgroups v1, each resource subsystem—such as CPU, memory, disk I/O, and networking—had its own independent directory tree mounted under /sys/fs/cgroup. This independence created severe inconsistency issues: a process could belong to one group in the CPU tree while tied to a completely different group in the memory tree.
This lack of unification caused race conditions, hard-to-debug lockups, and chronic failures in I/O control. For instance, when the kernel attempted to apply I/O throttles to a process, it frequently failed to track which cached memory pages belonged to that group, resulting in unthrottled writebacks that bypassed imposed limits. Furthermore, OOM Killer (Out Of Memory Killer) behavior in cgroups v1 was erratic, often killing critical system daemons instead of terminating only the runaway application.
cgroups v2 solved this mess by implementing the unified hierarchy model. Under this approach, every process on the system belongs to exactly one node in the cgroups tree. The structure directly mirrors the system process tree, guaranteeing that CPU, memory, I/O, and thread controls operate under the same hierarchical context. Resource controllers are explicitly enabled at each level via the cgroup.subtree_control interface file.
Another crucial innovation in cgroups v2 is Pressure Stall Information (PSI). PSI allows the kernel and monitoring daemons to measure in real time how much execution time tasks lose due to CPU, memory, or disk I/O starvation. Regarding memory management, version 2 introduced a clear distinction between two core limits:
memory.high: Acts as a soft throttle limit. When group RAM consumption exceeds this value, the process is not abruptly terminated by the system. Instead, the kernel slows down memory allocation and forces the process to reclaim cached pages or enter a wait state, applying a preventive brake.memory.max: Represents the hard allocation cap. If the group hits this ceiling and no physical memory or swap space can be reclaimed, the OOM Killer is triggered specifically for that control group, terminating the offending task without affecting other services on the machine.
This integrated architecture ensures resource control happens predictably and safely, making infrastructure far more resilient against unexpected load spikes.
How to configure Linux to limit cpu and memory with cgroups v2?
To verify if your operating system is already running fully on cgroups v2, check the filesystem type mounted at /sys/fs/cgroup. On modern distributions like Debian 13.7 and Ubuntu 26.04.1, version 2 is enabled by default upon installation. Run a quick check in your terminal to confirm:
stat -f -c %T /sys/fs/cgroup
If the output returns cgroup2fs, the unified hierarchy is active and ready to use. Otherwise, you can enable it by appending systemd.unified_cgroup_hierarchy=1 to the GRUB bootloader kernel command line and rebooting the server.
While production environments should rely on systemd's built-in integration, understanding how to interact directly with the kernel's pseudo-filesystem interface is key to grasping how it works under the hood. Inside /sys/fs/cgroup, creating a new control group is as simple as creating a standard directory.
Here is a practical demonstration of creating a manual cgroup to limit cpu and memory with cgroups v2 in a test script:
# Creating the hierarchical node for the application
sudo mkdir -p /sys/fs/cgroup/meu_servico_teste

# Enabling CPU and memory controllers
echo "+cpu +memory" | sudo tee /sys/fs/cgroup/cgroup.subtree_control

# Setting maximum memory limit to 512 Megabytes (in bytes)
echo "536870912" | sudo tee /sys/fs/cgroup/meu_servico_teste/memory.max

# Setting CPU quota (format: quota period, in microseconds)
# The value 50000 100000 limits usage to 50% of a single CPU core
echo "50000 100000" | sudo tee /sys/fs/cgroup/meu_servico_teste/cpu.max
Once control files are configured inside the directory, any process can be moved into that group by writing its Process ID (PID) to the cgroup.procs interface file:
# Attaching current shell to restricted cgroup
echo $$ | sudo tee /sys/fs/cgroup/meu_servico_teste/cgroup.procs
From the moment the PID is written, all child processes spawned by that shell automatically inherit these resource limits. If a Python script attempts to allocate a massive array exceeding the 512 MB cap in memory.max, the kernel OOM Killer will act strictly inside meu_servico_teste, preserving overall system stability.
How to use systemd-run to limit resources in scripts without rebooting?
Directly tweaking files inside /sys/fs/cgroup on a production system is generally discouraged. Because systemd acts as the primary init manager and cgroup driver on modern Linux distributions, creating manual directories can lead to ownership conflicts in the cgroup tree. To run ad-hoc commands and one-off tasks under strict resource boundaries without modifying system unit files, systemd-run is the ideal solution.
systemd-run creates a transient unit (a temporary unit managed directly in systemd memory) that wraps your command inside an isolated scope. This is extremely useful for maintenance routines, Python data pipelines, or periodic cron jobs.
The syntax for enforcing dynamic limits with systemd-run is straightforward. Here is a real-world example capping a heavy processing task:
systemd-run --scope \
  -p MemoryMax=1G \
  -p MemoryHigh=800M \
  -p CPUQuota=150% \
  -p TasksMax=50 \
  python3 script_processamento.py
Let's break down each parameter passed to the command:
--scope: Tells systemd to execute the command inside the current process context rather than spawning a background service daemon.MemoryMax=1G: Maps directly to the cgroups v2memory.maxdirective, setting a hard ceiling of 1 Gigabyte of RAM.MemoryHigh=800M: Maps tomemory.high, triggering soft reclamation and preventive garbage collection once the script passes 800 MB.CPUQuota=150%: Ensures the task uses at most 1.5 CPU cores (150% of single-core processing time).TasksMax=50: Limits total concurrent threads and child processes the Python script can spawn, protecting against fork bomb vulnerabilities.
If you need to run a background daemon that stays active after exiting the terminal session, replace --scope with --unit:
systemd-run --unit=worker-python-transiente \
  -p MemoryMax=2G \
  -p CPUQuota=100% \
  python3 -m app.worker
You can track live resource usage for transient units in real time using systemd's metric tool:
systemd-cgtop
The systemd-cgtop interface dynamically displays active task counts, CPU percentages, disk I/O throughput, and memory consumption per unit, letting you verify your throttling policy in action.
How to create custom systemd slices for Python microservices?
When managing complex architectures composed of multiple microservices—such as Flask 3.1.3 or Django 6.1.1 web apps, asynchronous background workers, and local databases—limiting services individually may not be enough. Often, you need to group an entire family of services under a shared resource pool. This is where systemd slices come in.

A systemd slice is an organizational node inside the unified cgroups v2 tree. By default, Linux organizes execution into three main slices: system.slice (system daemons), user.slice (user sessions), and machine.slice (virtual machines and containers). Creating custom slices allows us to set explicit hardware allocation priorities.
Here is how resource constraints can be distributed across different workloads on a production server:
| Slice Name | Service Profile | Memory Limit (MemoryMax) |
CPU Limit (CPUQuota) |
CPU Priority (CPUWeight) |
|---|---|---|---|---|
infra.slice |
PostgreSQL 18.6 Database | No hard limit (Priority) | 400% (4 Cores) | 200 (High) |
backend.slice |
Python 3.14.7 Web APIs | 4 Gigabytes | 200% (2 Cores) | 100 (Normal) |
analytics.slice |
Batch Scripts and Reports | 1.5 Gigabytes | 50% (0.5 Core) | 20 (Low) |
To implement this architecture, create the slice unit definition file at /etc/systemd/system/analytics.slice:
[Unit]
Description=Resource Slice for Batch Processing and Analytics
Documentation=https://blog.exemplo.com.br/cgroups-v2-systemd

[Slice]
CPUAccounting=true
MemoryAccounting=true
MemoryMax=1.5G
MemoryHigh=1.2G
CPUQuota=50%
CPUWeight=20
After saving the file, reload systemd to load the new unit:
sudo systemctl daemon-reload
Now, any system service can be explicitly assigned to this resource pool by defining the Slice= parameter in the [Service] section of its .service file. Here is an example service configuration for a Python worker located at /etc/systemd/system/worker-analytics.service:
[Unit]
Description=Batch Processing and Reporting Worker
After=network.target postgresql.service

[Service]
Type=simple
User=www-data
WorkingDirectory=/var/www/analytics
ExecStart=/var/www/analytics/venv/bin/python main.py
Restart=always
RestartSec=5

# Direct association of service to Slice with restrictions
Slice=analytics.slice

[Install]
WantedBy=multi-user.target
Enable and start the service to apply the hierarchy immediately:
sudo systemctl enable --now worker-analytics.service
With this configuration in place, even if the analytics script runs into a memory leak or attempts to allocate dozens of gigabytes, the hard ceiling set by analytics.slice kicks in. The worker process will be restarted cleanly without impacting web API latency in backend.slice or knocking PostgreSQL offline.
To inspect how systemd is distributing slices and view member units under each node, use the cgroup tree command:
systemd-cgls
The resulting output displays each service neatly organized within its assigned control group, demonstrating the predictability and elegance of unified management with cgroups v2 on modern Linux.
Conclusion
The industry shift to the unified cgroups v2 architecture represents one of the most important milestones in modern Linux systems administration. By replacing the fragmented subsystems of v1, the Linux kernel delivered an incredibly accurate platform for hardware resource control and workload isolation.
By leveraging metrics like memory.max and memory.high along with systemd abstractions—such as transient units via systemd-run and hierarchical resource pools via .slice files—you can build crash-resilient infrastructure. Whether you are scaling Python 3.14.7 microservices or keeping mission-critical databases stable, knowing how to limit cpu and memory with cgroups v2 makes server management declarative, robust, and production-ready.